Sublimating is a fun hobby for everyone. You can transfer unique designs to tumblers, mugs, and other ceramic or metal dishware to give them some personality. However, do you need to pick up a sublimation heat press, or can you get by with a regular oven?
It is possible to sublimate using a regular convection oven. However, you separate your sublimation oven from your everyday baking oven since the chemicals from sublimation can contaminate the walls, leaving the oven unfit for food.
In this guide, I’ll explain what sublimation is, what materials you’ll need, and how you can use a regular oven to sublimate tumblers.
What Is Sublimation?
Sublimation is a fancy term for transferring images to a specific type of material. The process uses both heat and pressure to permanently transfer ink from sublimation paper to ceramic mugs, tiles, coasters, and even polyester fabric. There are all sorts of ways to transfer ink to a material, such as a screen pressing and transferring vinyl, but sublimation is a lot more cost-efficient, simple, and fun!
Not only is it cheaper, but sublimation also produces a finer end product. As long as you know how to use a software editing program and print your design on sublimation paper, you’re about halfway there from personalizing mugs, tumblers, and much, much more.
Sublimation Materials and Supplies
The average sublimation business will need a capital of around $1,000 to get started. That might seem like a lot, but printing businesses can make big bucks by personalizing drinkware for companies, schools, sports clubs, and all sorts of organizations.
So, if you want to give sublimation a try, you’ll need to purchase the following materials and supplies:
Sublimation Printer
The main difference between sublimation printers and traditional printers is how it releases ink onto the paper. Traditional printers usually squirt ink onto paper, whereas sublimation printers release vaporized ink that permeates the surface of the specialized paper. The ink vapors can be further transferred to plastic substrates permanently. The typical sublimation printer will cost around $250, but there are high-end models that guarantee better ink transfer for higher-quality results.
Sublimation Ink
This is a specialized ink that, when heated, turns into vapor without turning into a liquid. This rapid state from solid to gas prevents the ink from spreading, ensuring that the crisp details of your intricate design are transferred perfectly onto plastic, fabric, or clay-based materials.
Sublimation Paper
Sublimation paper feels different from traditional printing paper. While it comes in the same A-series sizes (A0, A1, A2, A3, A4, etc.), it is considerably thicker (at least 120 GSM, on average) and has a super-thin coating of polyester.
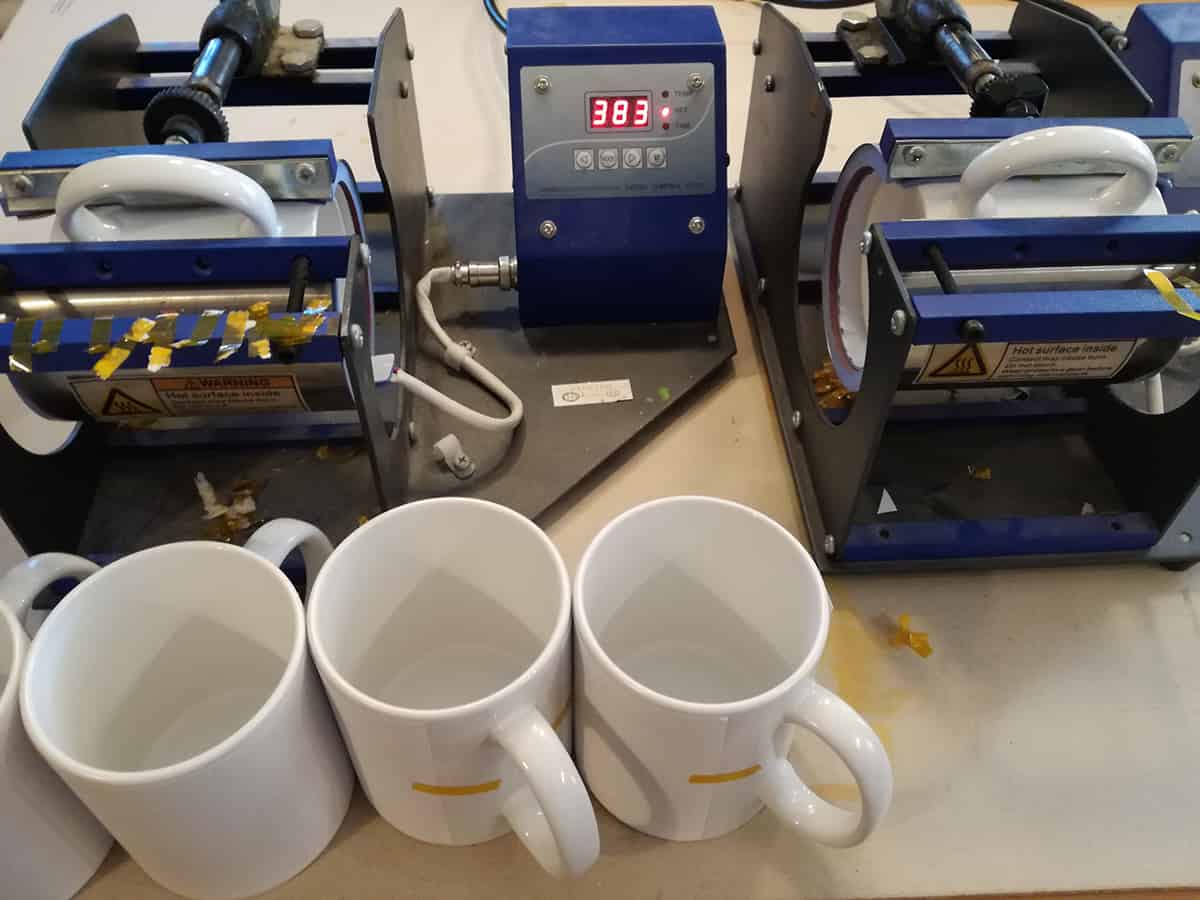
Heat Press
Sublimation requires a heat press to transfer ink from sheets of paper to another material. If you want to dye-sublimate shirts, you’ll need a massive heat press that provides equal heat across the wide heating press. You can also get specialized heat presses for mugs, tumblers, and other small objects.
Can You Sublimate in a Regular Oven?
If you’re reading this, you’re probably wondering whether you can sublimate in a regular oven. The good news is, yes, you can use a regular oven for sublimation. The bad news is that you probably shouldn’t.
Again, sublimation requires both heat and pressure to transfer ink-based designs from sublimation paper to the surface of an object. Sublimation requires at least 375°F to adequately vaporize ink for permanent transfers, which ovens can unquestionably do. However, without the right supplies, you won’t be able to press the paper against the sublimated object for proper ink transfer. What you might end up with is an unsellable splotchy product.
So, this pretty much eliminates dye-sublimating clothing, aprons, and other clothing materials. But what about mugs and tumblers?
How to Sublimate in a Regular Oven
As I said, it’s possible to sublimate in a regular oven or as regular as a convection oven is. However, your sublimation options are limited to small objects that fit inside an oven, such as mugs and tumblers.
To get started, you’ll need the following supplies:
- Your design printed on sublimation paper
- Heat tape
- Sublimation-ready tumbler
- Shrink-wrap sleeves
- Heat gun
- Countertop convection oven
- Four 1-inch wooden cubes (or another heat-safe material)
- Wire cooling rack
- Place the four wooden cubes on your kitchen counter and place the wire cooling rack on top of them. Most countertop convection ovens won’t accommodate tall tumblers, which is why we have to flip the convection oven onto its side. Yes, this can be dangerous, which is why using a heat press is a much safer alternative. When the cubes and cooling rack are in place, place the oven on top of the rack.
- Preheat your oven to 400°F. The oven needs to maintain a temperature of at least 375°F to transfer the image to the tumbler properly. When you open the oven, the internal temperature will drop significantly, which is why we want to preheat the oven to a higher temperature.
- Wrap the tumbler in your sublimation design. Make sure the seams are where they’re supposed to be. You can use cutters to trim the paper down to size, leaving margins where you want them. Ideally, there will be a white margin on one side of the paper that overlaps with the other side when you wrap it around the tumbler.
- Secure the seam with heat tape. The specific tape I linked above can withstand temperatures of beyond 500°F. While you won’t need to broil your tumbler, it’s nice to know that the tape won’t warp in shape or melt in the convection oven. Make sure the seam is completely covered in the heat tape.
- Cover the tumbler in a shrink-wrap sleeve and heat the sleeve with a gun. The tape doesn’t provide enough pressure to press the sublimation paper against the tumbler, but shrink wrap does (to an extent). Make sure to heat the shrink-wrap sleeve until the sublimation paper is pressed tightly against the tumbler.
- Insert the tumbler with its seam side facing the door. We will need to rotate the tumbler several times in the oven. So, with the seam side facing the door, we can keep track of how many times we have rotated the tumbler during the baking process.
- Bake the tumbler for 2 minutes, rotating it 90° every 30 seconds. After the 2 minutes have elapsed, the seam side should be facing toward the side of the oven from the third rotation.
- Remove the tumbler from the oven and let it rest at room temperature for 7 minutes. Don’t try to remove the shrink-wrap sleeve and sublimation paper just yet. Allow the ink to cure on the surface of the tumbler by letting the tumbler rest for around 7 minutes.
- Unwrap the tumbler. After 7 minutes, remove the shrink-wrap sleeve and sublimation paper and marvel at your personalized tumbler!
Tips for Sublimating in an Oven
Again, sublimating in an oven isn’t the best thing you can do. For guaranteed results, you should use a specialized heat press. Not only does it provide the heat and pressure needed to transfer ink-based images perfectly, but it works a lot more quickly than an oven.
That said, if you want to try to sublimate in your oven, here are a few tips you can follow:
- Use a thermometer to measure the heat of your oven. The built-in temperature control or thermometer in an oven isn’t always accurate. To get the best results, insert an oven thermometer into the oven and use its dial as a guide. That way, you’ll know whether or not the internal temperature has dropped below 375°F.
- Experiment. Not every portable convection oven is built the same, and the oven’s performance can be significantly reduced by flipping it on its side to accommodate tall tumblers. So, your oven might take more than 2 minutes to sublimate tumblers and mugs.
- Don’t bake foods in the same oven as your sublimation oven. The chemicals from the sublimation ink and paper can vaporize and contaminate the oven’s walls. While a deep clean may get rid of the chemicals, it’s best to separate your baking oven from your hobby sublimation oven.