A roast is called a roast because it’s, well, roasted. They’re pretty big slabs of meat (usually up to 10 pounds), which means they may spend several hours in the oven, cooking low and slow. So, when should you sear it to give it some color and texture? Before or after baking?
You can sear a roast before or after putting it in the oven. Searing it before baking will make the meat juicy in and out, whereas searing after baking (a process known as reverse searing) will produce a crispier exterior.
In this guide, I’ll explain why searing your meat matters, the differences between the 2 searing methods, and how to sear a roast on a stove and in an oven.
Why You Should Sear Meat
Oftentimes, you’ll hear professional and self-proclaimed chefs claim searing your meat adds flavor. If you’ve ever tried searing meat before, you probably know how true this claim is. But what is the science behind this?
First and foremost, searing is a cooking method that involves heating the surface of food at a higher temperature for a brief period of time. So, why is searing essential?
Searing causes surface moisture to evaporate, giving the cut of meat a dryer texture. When you remove water from meat or vegetables, it becomes crispier with heat as the natural sugars liquify, heat up, and caramelize. What you’ll typically end up with are dark bits caked onto the pan, which you can use as a flavoring agent to make gravies and other sauces.
One common misconception is that searing meat “locks in” the juices. Alton Brown, the chef-scientist extraordinaire, busted this myth in an old episode of Good Eats. In his test, searing meat had the opposite effect of locking in juices—the cuts of meat actually lost moisture when seared. However, the texture contract between the crispy exterior and juicy interior makes searing worth the effort.
So, if you find your cuts of steak or roast turning out moist, bland, and unexciting, you should try giving them a quick sear on all sides.
Should You Sear a Roast Before Putting It in the Oven?
We’ve established the importance of searing meat, but when should you do it—before or after baking it in the oven?
In all honesty, it doesn’t really matter when you sear the roast as long as you do it before or after baking it.
That said, there are a few key differences you should know when contemplating whether or not to sear the roast before cooking it in an oven.
Traditional searing
Traditional searing, pre-searing, or simply just searing refers to the common practice of searing meat before finishing it in indirect heat or inside an oven.
Searing roast before putting can be a bit challenging, especially to amateur cooks. After searing the roast, you will have to figure out how much longer it will take to cook in the oven. For instance, if you’re shooting for a medium-rare roast, you will have to take the total cooking time and subtract the searing time from it.
Of course, you can avoid the headache of doing quick math in your head by picking up a meat thermometer. The TermoPro TP16 is an excellent choice since the probe stays in the meat as you bake it in the oven. You won’t have to open the oven door and risk releasing all of the built-up heat. Simply wait until the thermometer reaches your intended cooking temperature before pulling the meat out and letting it cool on the countertop.
Reverse Searing
Reverse searing is the reverse of traditional searing in the sense that the searing process is done after the meat is fully cooked. If you didn’t sear the meat beforehand, it would look like a grayish-brown blob, which sounds pretty unappetizing. But don’t worry—reverse searing the roast will give it some color, life, and a whole lot of flavor!
This is the recommended method of searing meat if you have no idea what you’re doing. After cooking the roast to the desired temperature, take it out, let it cool slightly, then finish searing the meat on a hot pan or open flame.
The upside of reverse searing is that if the roast comes out slightly undercooked, giving it a final sear can cook the interior as it crisps up the surface. You cannot do this when traditionally searing a roast without running the risk of burning the exterior.
How to Sear a Roast
Searing, whether you’re using the traditional method or opting for reverse searing, is a quick and easy procedure. As long as you have your slab of meat fully prepared and a large skillet with at least 1 tablespoon of oil with a high smoke point, searing your roast should be a breeze.
You can try searing a roast in your oven or on a stove. Here’s how you do it:
If you’re going to sear your roast before baking it in an oven, make sure you use an oven-safe skillet. That way, you can transfer the seared roast directly to the oven without transferring it to another cooking vessel. Also, while searing your meat, remember to preheat your oven to the desired baking temperature (low and slow!).
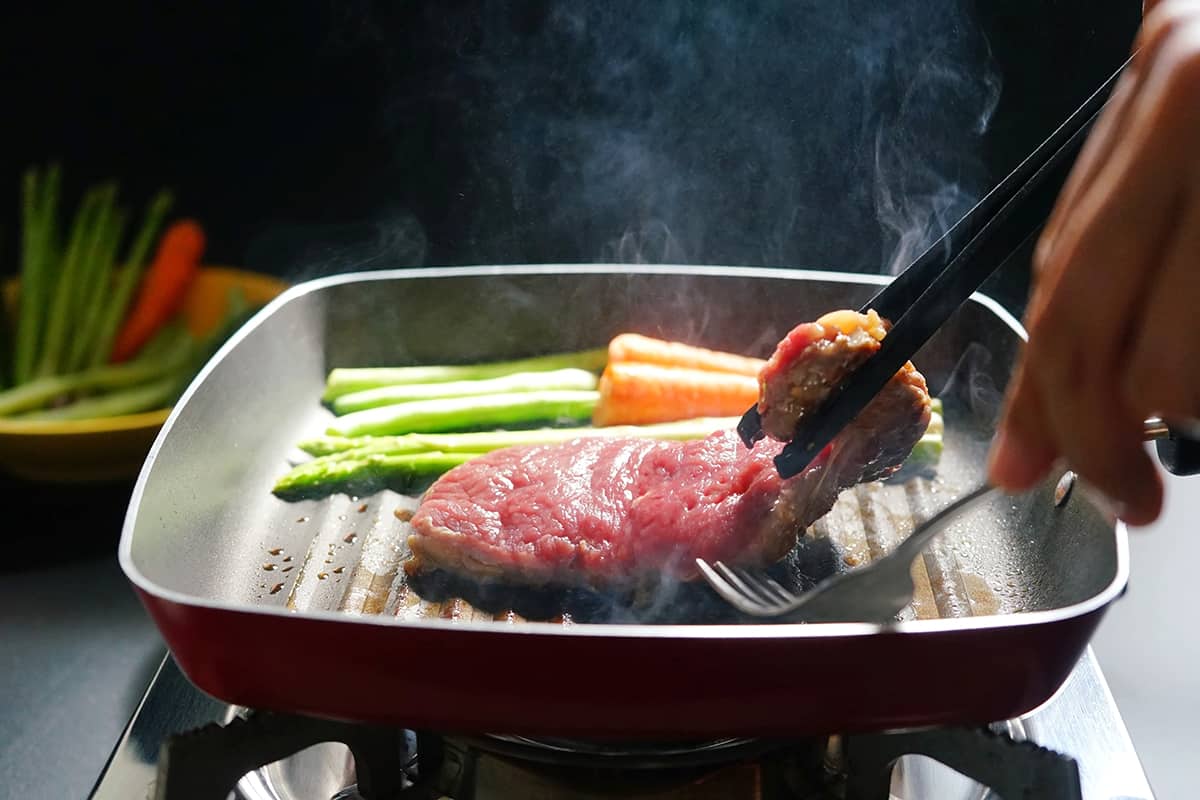
1. Pre-searing on a stove
- Pull the roast out of the fridge and let it come down to room temperature.
- Pat the surface of the roast dry with clean paper towels.
- Heat a stainless-steel or cast-iron skillet.
- Pour 1 tablespoon (or more) of your oil of choice.
- Wait until the oil comes up to at least 300°F.
- Carefully lie the roast onto the skillet.
- Let it sit on one side for 1 minute before flipping it over.
- Use tongs to prop up the roast to sear it on both ends.
- Gauge the brownness level of the roast—if you want it browner and crispier, continue searing it for an additional 30 seconds.
- When the roast is done searing, transfer it to a preheated oven to finish cooking.
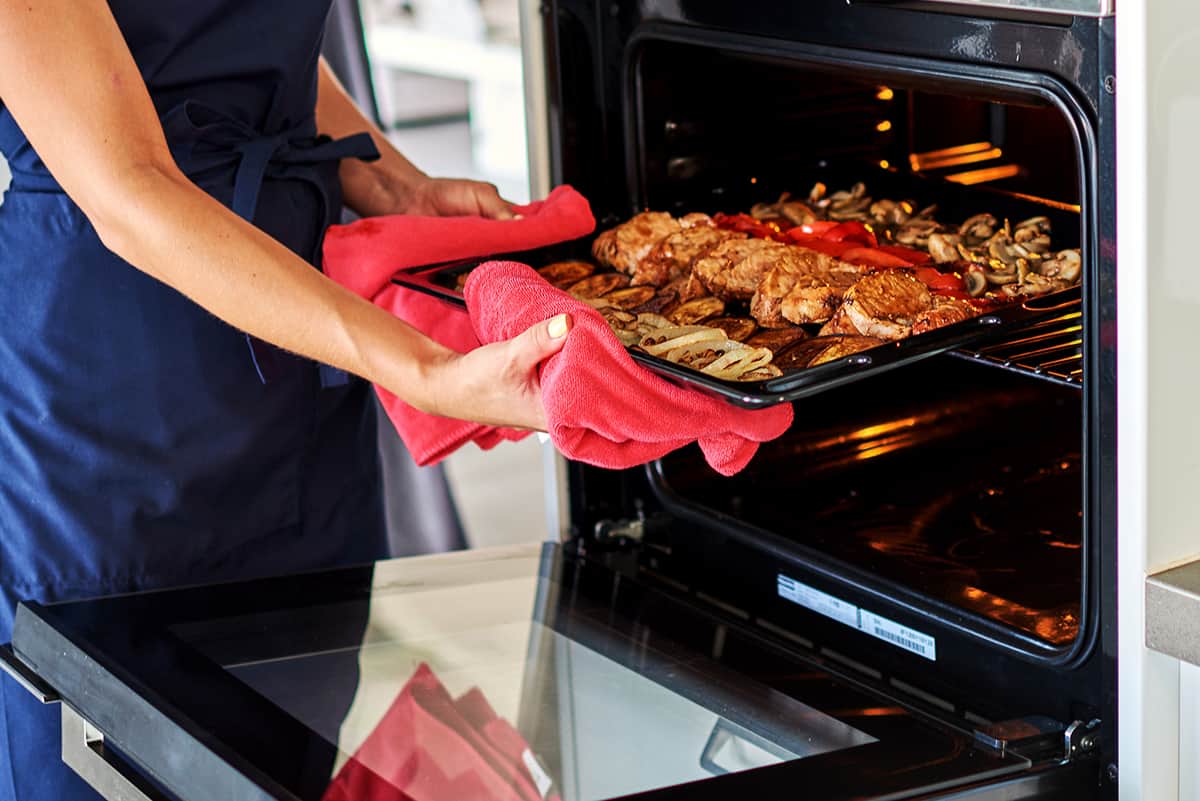
2. Pre-searing in an oven
- Preheat your oven to 100 or 125°F higher than your roasting temperature.
- Place 1 to 2 tbsp of oil in the roasting pan while also rubbing some of the oil all over the roast’s surface.
- When the oven is hot, place the roast in the middle of the center rack.
- Sear the roast for 10 minutes.
- Reduce the temperature of your oven to your desired cooking temperature and finish roasting.
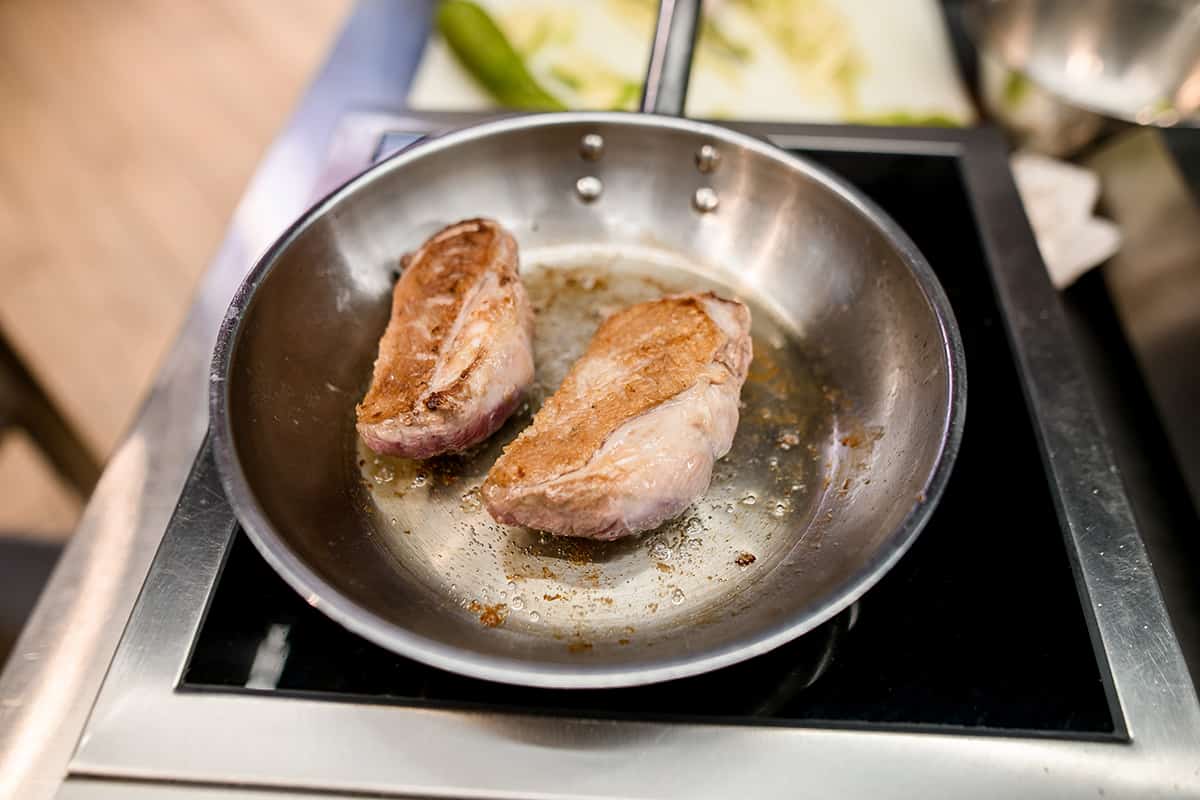
3. Reverse searing on a stove
- Pull the roast out of the oven when it’s done baking.
- Cover the roast in an aluminum foil tent for 10 to 20 minutes.
- Heat a skillet with 1 to 2 tablespoons of your cooking oil of choice.
- When the oil is hot, carefully place the roast on the skillet.
- Sear the roast on all sides until it’s as brown and caramelized as you like.
- After searing the roast, remove it from the skillet and, again, cover it in an aluminum foil tent to cool down before serving.
4. Reverse searing in an oven
- Pull the roast and roasting pan out of the oven.
- Crank the oven up to 100 or 125°F above the original roasting temperature.
- Cover the roast in an aluminum foil tent while waiting for the oven to heat up.
- When the oven is ready, remove the foil tent and place the roasting pan back inside the oven.
- Sear the roast for 10 to 15 minutes.
- Every 2 to 3 minutes rotate the pan 180°.
- Continue searing the roast until it’s as brown and caramelized as you like.
- Remove the roast from the pan and cover it in an aluminum foil tent before serving.